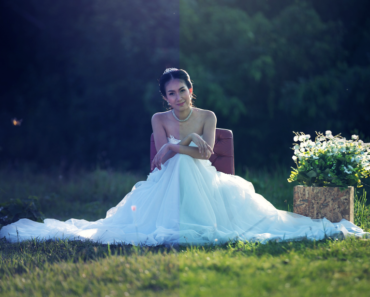
In this quick tutorial you will learn how to replace a sky in photoshop using blend modes to bring your photos to life. This technique works best on the images which has light gray sky.
Final Image:

Resources:
Step 1
Open the girl image in photoshop.

Create a new empty layer, using soft brush with gray color(#adacae) paint over the sky.

Step 2
Place the sky image at the top and flip it horizontal to change light source in the sky to right side.
(To flip it horizontally, select the duplicated sky layer and go to Edit>>Transform>>Flip horizontal )
Position it to match horizon of the girl image.
Mask the image up to horizon.

Duplicate the sky image flip it vertically and place it to look like a reflection of the sky.
(To flip it vertically, select the duplicated sky layer and go to Edit>>Transform>>Flip Vertical )

Step 3
Group these two sky layers (select the two layers and press Ctrl + G) and set blending mode of the group to Overlay.

Make selection of the girl in the foreground, the selection doesn’t have to be perfect. Select the folder and click on the “Add layer mask” button at the bottom of the layer panel.

Invert the layer mask of the folder (select the mask thumbnail of the folder and press Ctrl+I) to invert the masking.

Apply Gaussian blur to the layer mask of the folder to blend in the sky around the girl.

Set duplicated sky layer’s(reflection of the sky) opacity to 23%.


To give depth of field effect, add Field Blur to both the sky layers at the horizon in the following way….
(To add Field Blur, go to Filter>>Blur Gallery>>Field Blur )


Finally, add “Curves “ adjustment layer to the girl image (below the sky group) and adjust brightness to your liking.


I hope that you find this tutorial useful!

