In some of your images, you may notice a warmer tone or colder tone. This may be because white balance wasn’t set properly when the photo was taken. Now, in this short tutorial, we try to correct the white balance in photoshop.
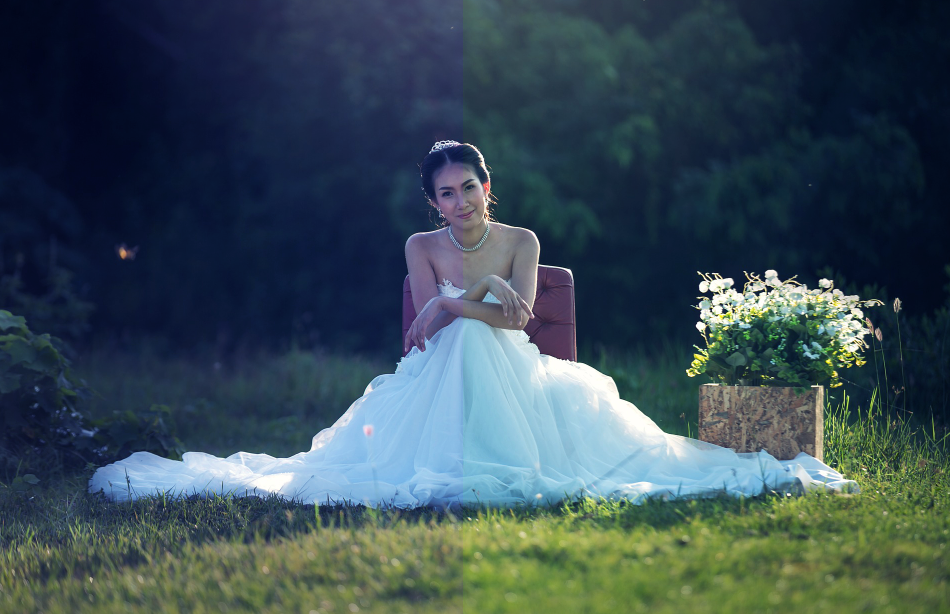
Final result:
Setting Gray Point:
Step-1
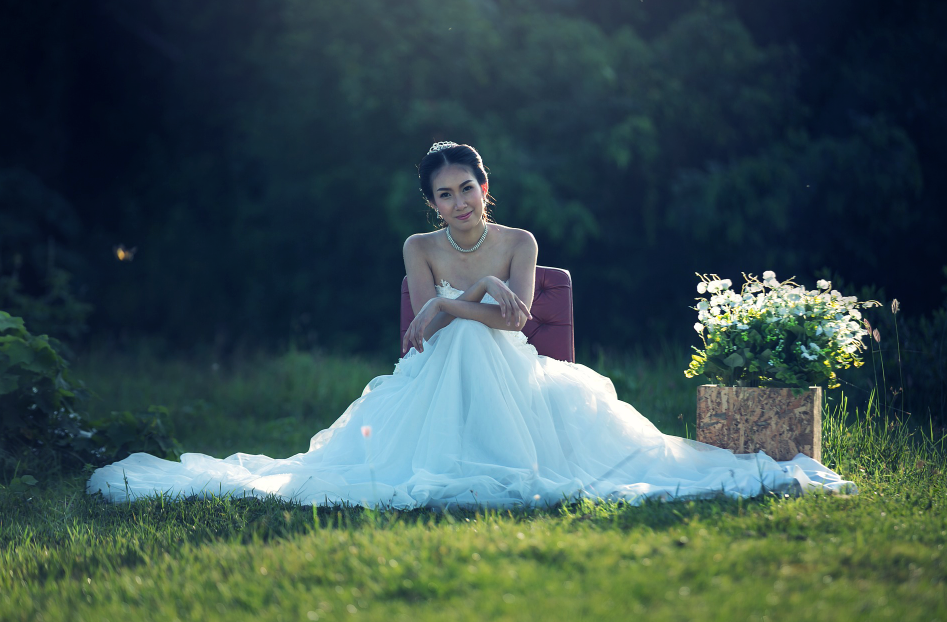
Open up the image which you want to color correct in photoshop.

In the above image, you can see there is blue cast in it and we try to fix that in this tutorial.
Step-2
Create a new layer on top of the current layer.
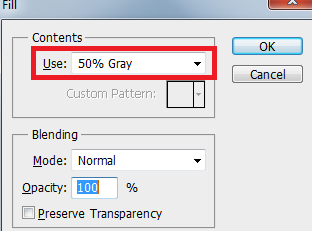
Fill it with gray color ( #808080 ) : go to edit>>fill and select “50% gray” from popup panel.
Step-3
Set blending mode of the layer to “Difference”. The result should be like this.

Step-4
Add “Threshold” adjustment layer: go to Layer>>New Adjustment layer >> Threshold
In “Threshold” panel, Move the slider to complete left. This will turn the image into complete white.

Now, move the slider slowly towards the right side just enough to show up some black spots in the image, something like this…

Usual threshold level range is between 10-20, this range differ from image to image.
Step-5
Select Eyedropper Tool (I).
Go to dark solid spot in the image, press shift + click on the spot to place a mark, this spot is our gray point in the image.

Step-6
Remove threshold adjustment layer and gray filled layer.

Step-7
Add “Curves” Adjustment layer : go to Layer>> New Adjustment Layer >> Curves.
In the “Curves” panel select “Sample in image to set gray point” eyedropper.

Finally, click on the mark which we set in the previous steps to the final result like this….