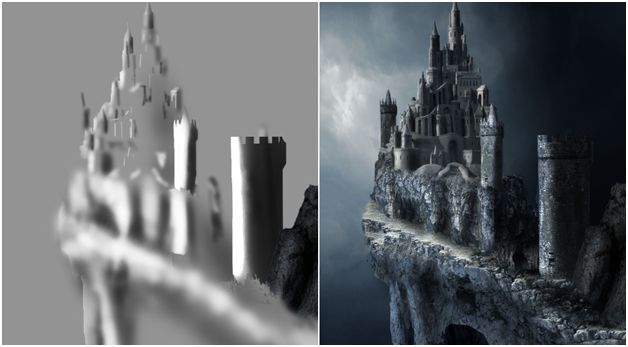
Based on a rough sketch, we try to develop a dark, misty and ominous scene using multiple stock images and also implement essential blending , lighting and shading techniques.
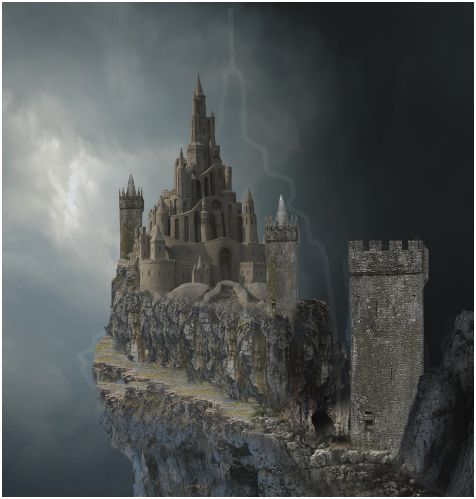
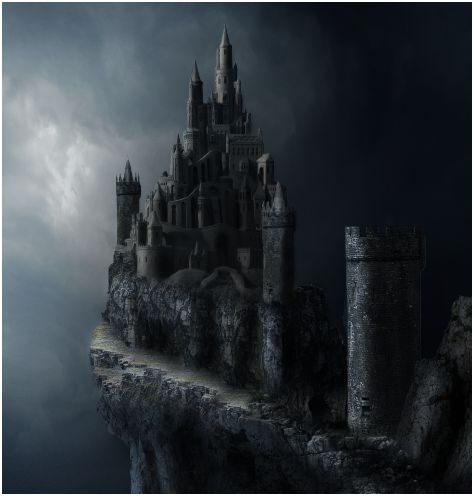
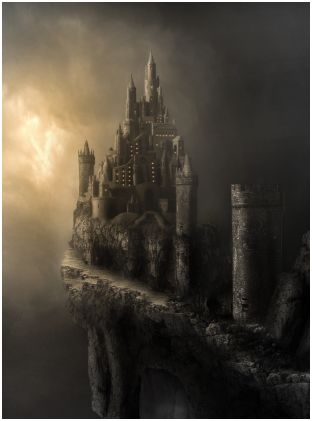
Final Image:

Resources:
Step-1
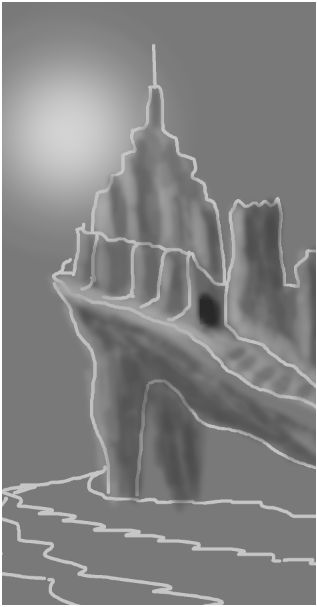
This is our rough sketch with file size 950 X 1920 px.
This is the sketch on which we are going to build our scene.
Step-2
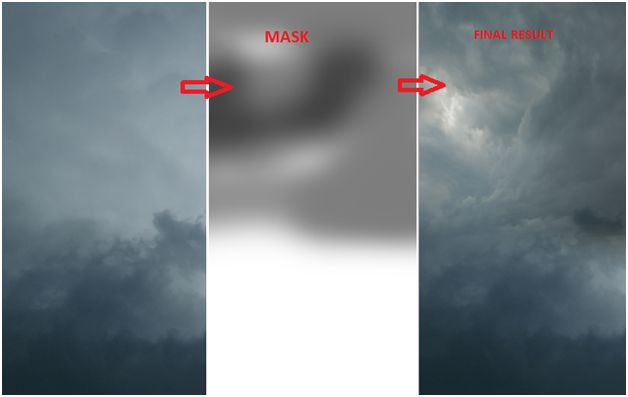
Import sky image into the scene.
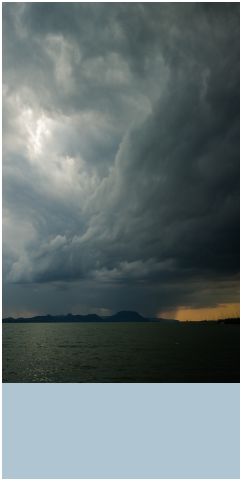
Import the other sky image, place it at the bottom and mask out the unwanted areas.
Step-3
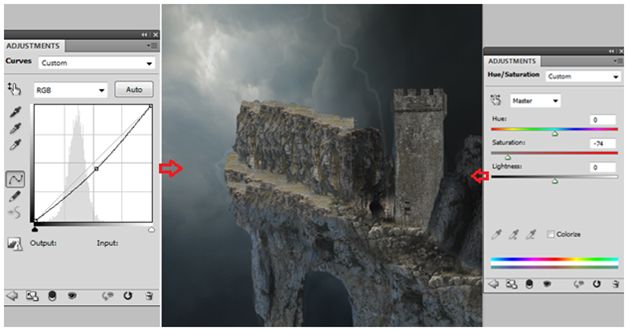
To improve the darkness of the scene, add “curves” adjustment layer with following properties and mask the following area in the layer mask of the adjustment layer for light source.

Step-4
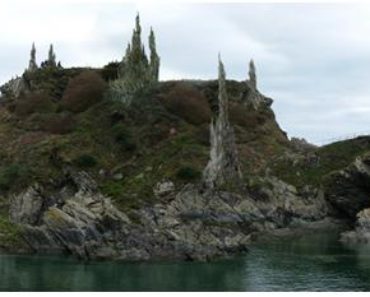
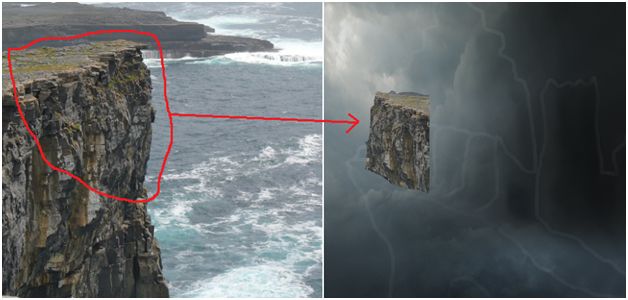
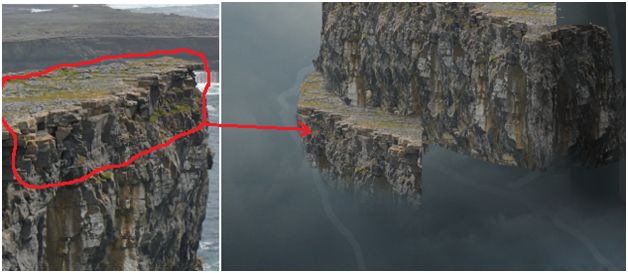
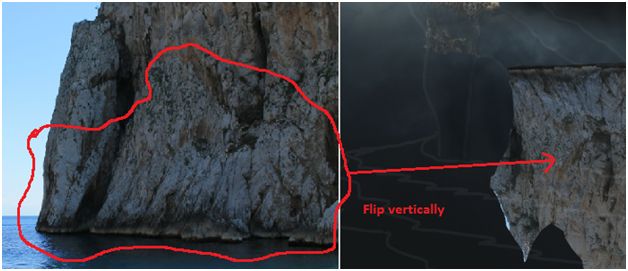
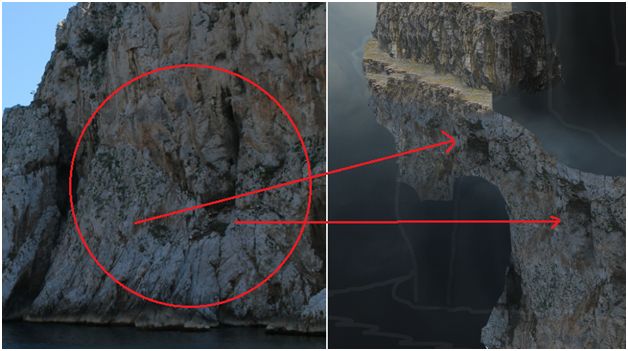
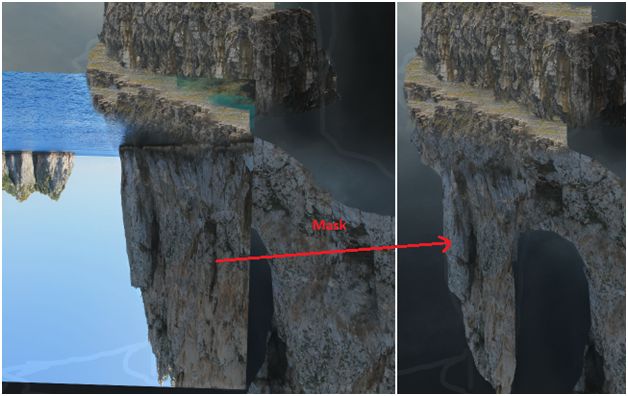
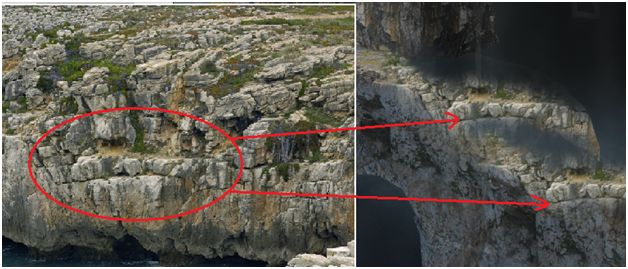
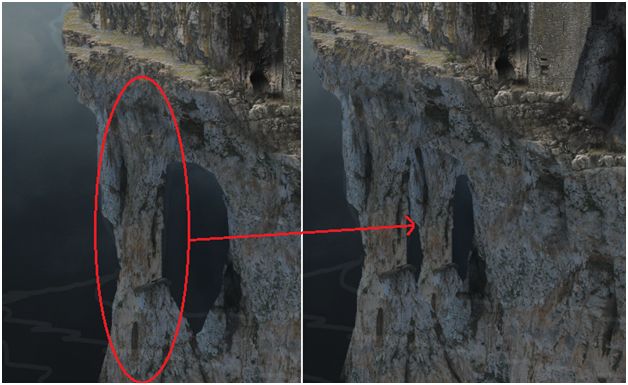
In this step, we stitch specific areas of the different stock images together to create a cliff.
Do not worry about lighting, shading and color blending, we will take care of that in next steps.
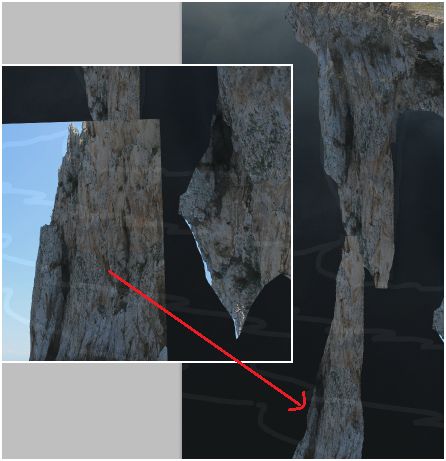
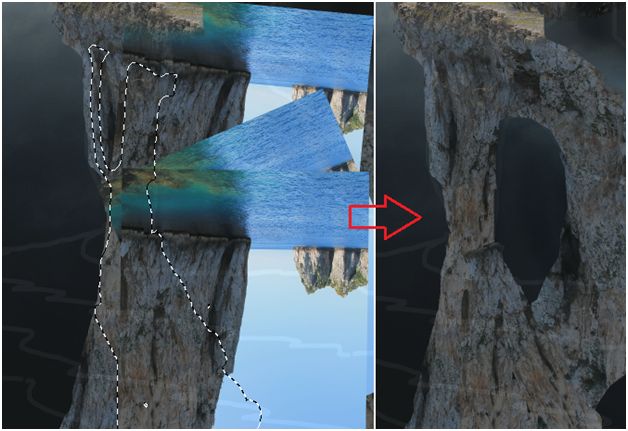
Just focus on positioning the images and masking unwanted areas as per the rough sketch.
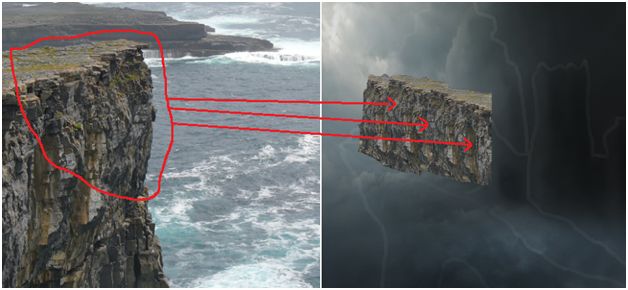
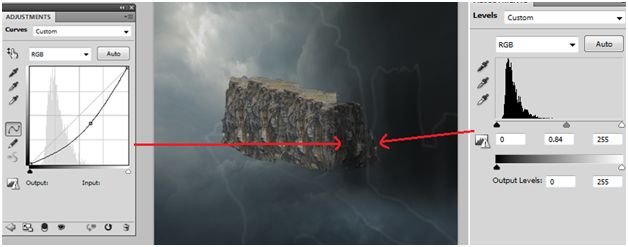
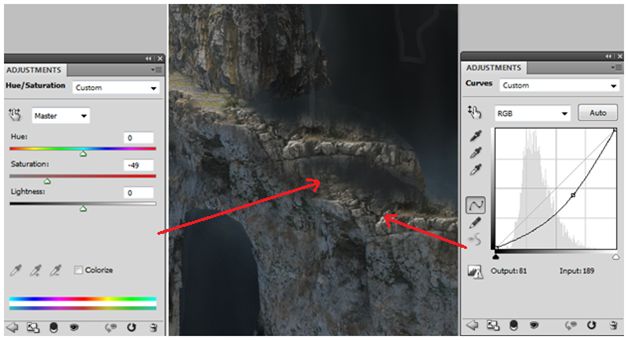
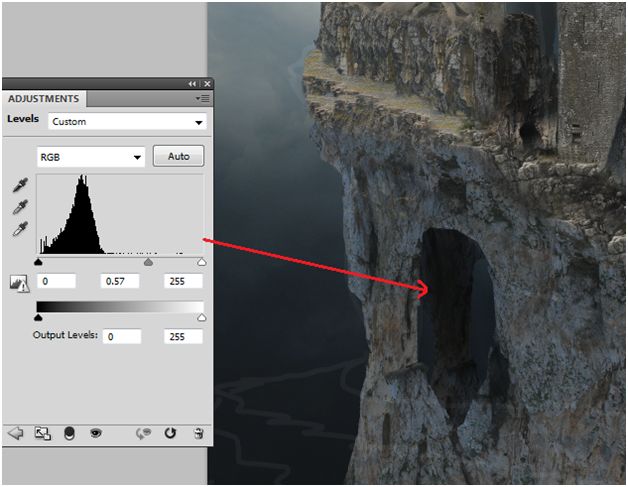
Using adjustment layers ‘curves’ and ‘levels’ decrease lighting on the following area.

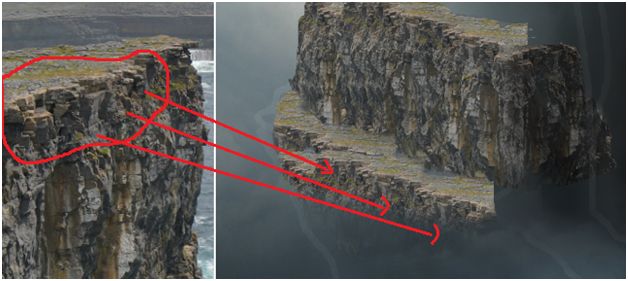
Note: Since we are copying the same area multiple times, the scene will look like a pattern. To avoid that, paint some areas using ‘Clone Stamp Tool (S)’ .
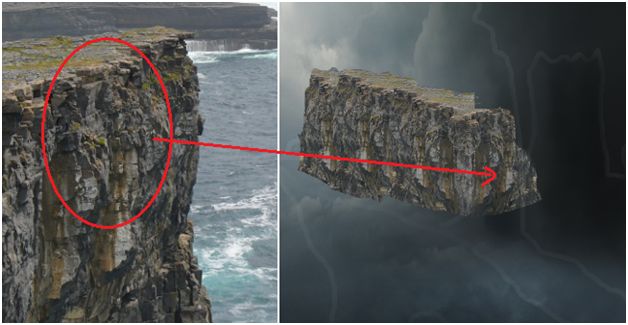
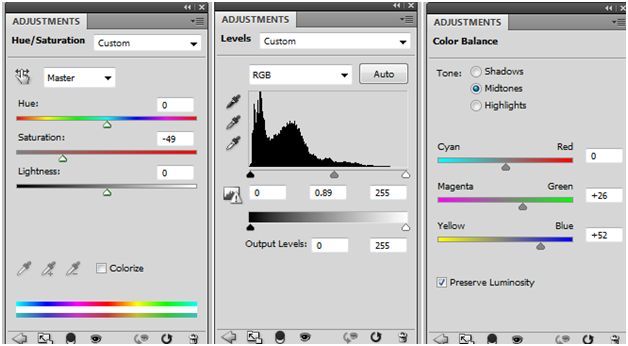
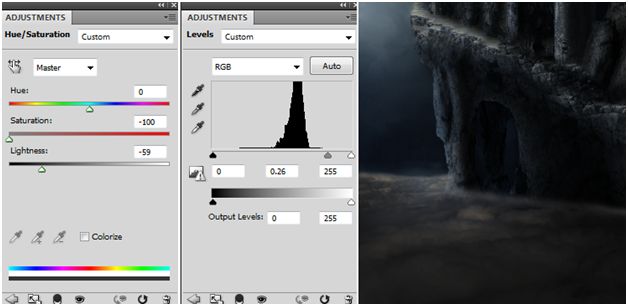
Add adjustment layers ‘curves’ and ’Hue/Saturation’ with following properties to decrease saturation and lighting.


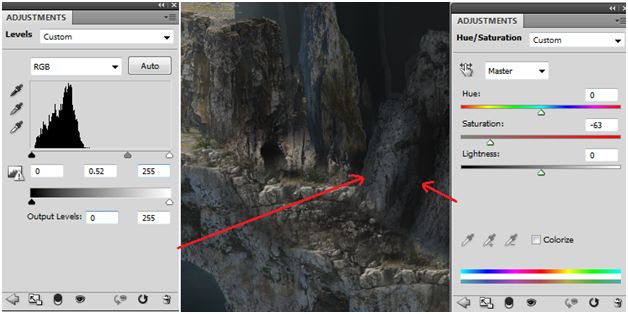
Add adjustment layers ‘levels’ and ’Hue/Saturation’ with following properties to decrease saturation and increase shadows.
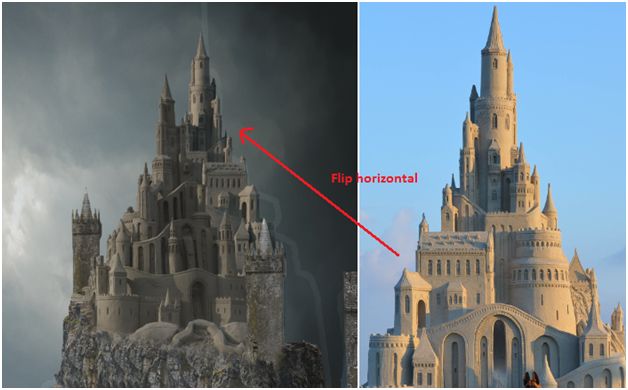
Add Towers:
Step-5
Import tower image into the scene and mask out unwanted areas.
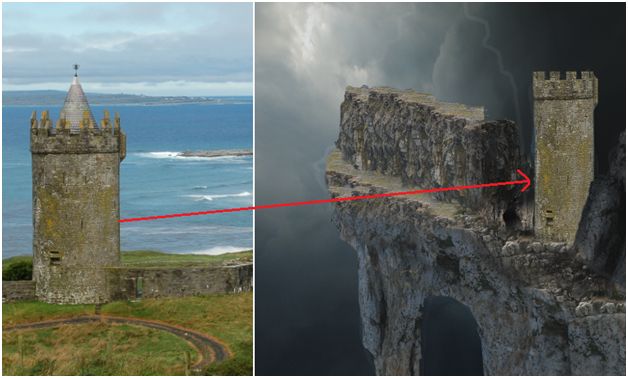
Lets blend the image into the scene, using adjustment layers ‘Hue/Saturation’ and ’curves’.
Similarly, add two more towers to the scene.

Add Castles :
Step-6
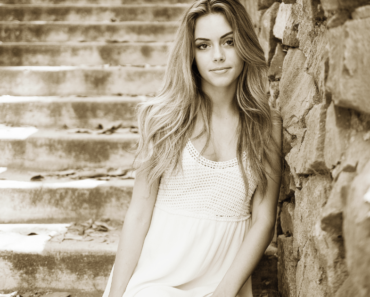
Import castle image into the scene, using polygonal tool select the palace and mask rest of the image.
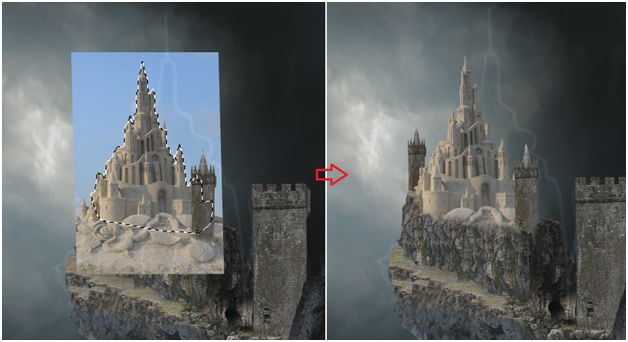
Add adjustment layers ‘Hue/Saturation’,’color balance’ and ‘curves’.
In the same process, add one more castle in the back.
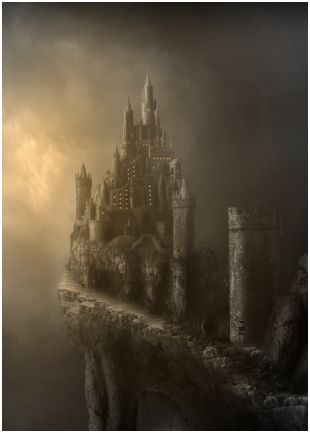
Step-7
Duplicate the following part of the cliff and place behind it.
Lets increase its shadows to give it depth using ‘levels’.
Step-8
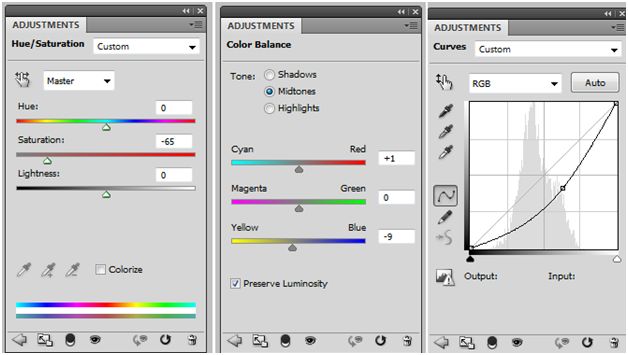
Lets change color saturation, shadows and color of the whole scene, using adjustment layers ‘Hue/Saturation’, ‘levels’ and ‘color balance’.

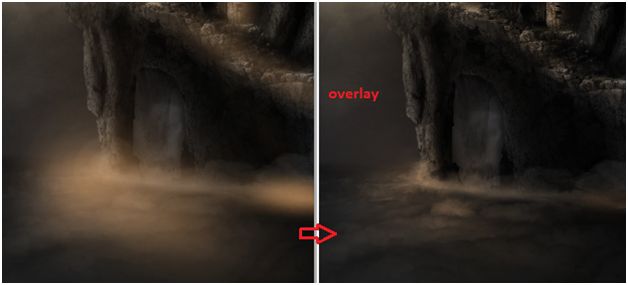
Step-9
Create a new layer at the top of all layers.
Fill it with gray color(#939393).
Set blending mode to ‘Overlay’.
Now using, dodge tool paint the layer to highlight the parts of the scene in response to the lighting and in the same way using burn tool, add shadows to the scene.
In a new layer above all, using soft brush (black color) with opacity 20% , paint the scene to decrease lighting.
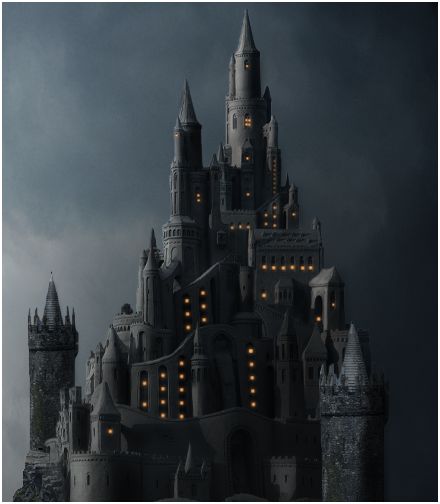
Add lights to the castle:
Step-10
Using a soft brush with orange color (#f69546), add dots to the castle to get lighting effect.
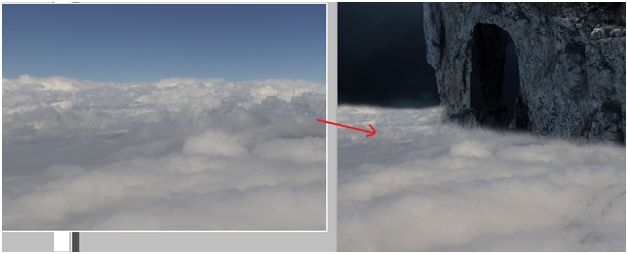
Add clouds, fog, lighting and rays:
Step-11
Import clouds image into the scene, place it at the bottom of the cliff and mask the clouds around the cliff in the following way.
Step-12
Lets decrease lighting and saturation of the clouds with adjustment layers ‘Hue/saturation’and ‘levels’
Step-13
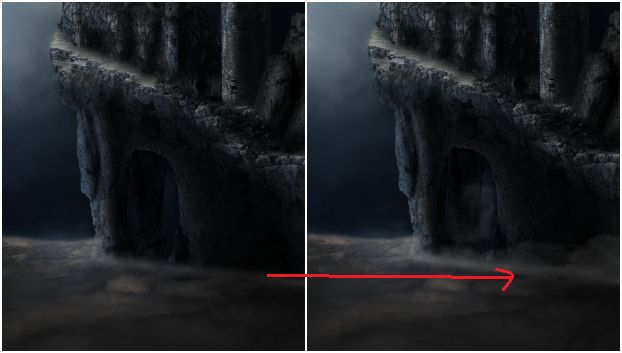
Using soft brush with white color and opacity 25%, add clouds around the cliff like this.
Step-14
In a new layer, paint some fog using soft brush with white color and opacity 15%.
Step-15
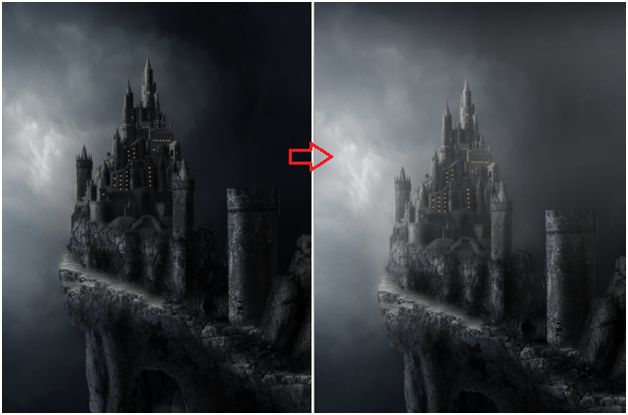
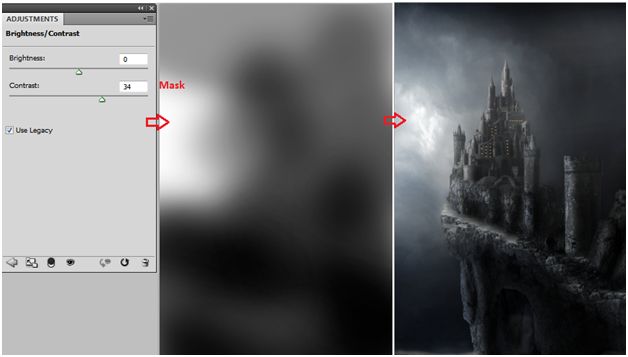
Lets increase brightness in the sky using adjustment layer ‘Brightness/contrast’ and mask unwanted areas.
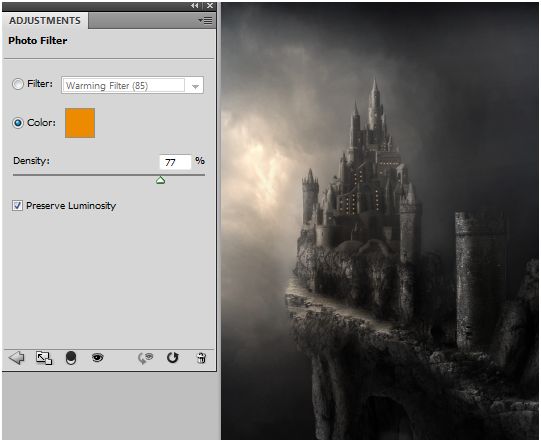
Step-16
Add photo filter with following settings.
Step-17
Lets increase the orange color in the sky a bit more.
Using soft brush with orange color(#f69546) and opacity 15% , paint in a new layer like this.
Set blending mode to ‘color’.
Step-18
In a new layer, using soft brush with the same orange color and opacity 25%, paint over the clouds and set layer mode to ‘overlay’ .
Finally, add light rays to the scene using same orange color with soft brush.
Final Image: