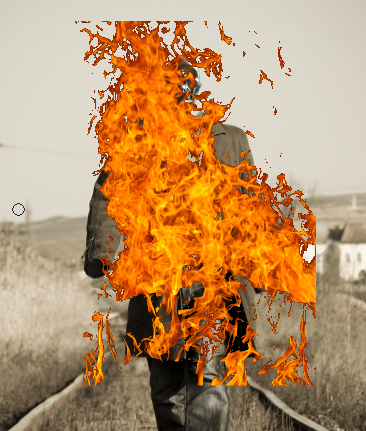
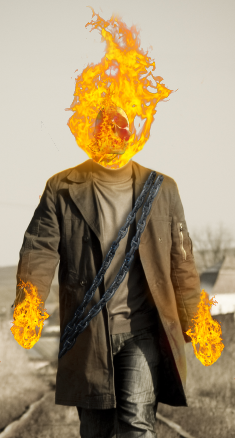
Final Image:

Resources:
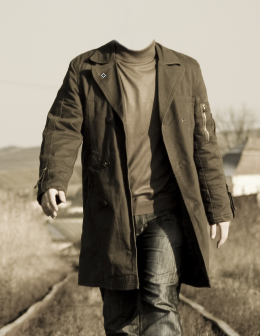
Step-1
Open the main photo which we are going to ghost rider it.

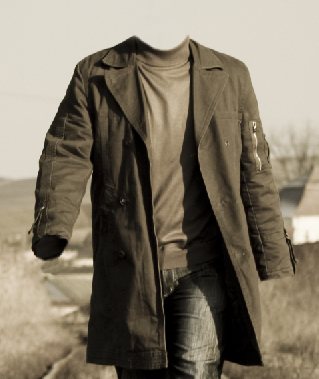
Step-2
Remove the head of the man using “Clone Stamp Tool (S)”.
Step-3
Remove hands too..
Step-4
Select skull using “polygonal Lasso Tool (L)”
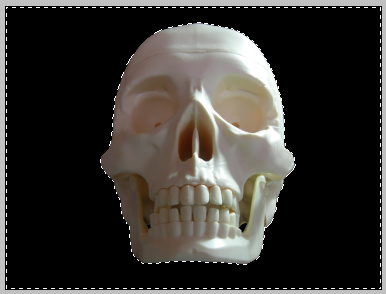
Step-5
Delete the unwanted area and resize to place it over the shoulders like this…..

Working with fire:
Step-6
Here we choose the following fire image.

Step-7
Select fire image layer and double click it to open “Layer Style” and set properties like this…

You get result like this….
Step-8
Erase the following unwanted parts.
Step-9
Once again double click the layer to open up the “Layer style”.
Press “Alt” and click one (right)side of the triangle and drage it to split it.
This is to set blending range in the following way.

You get result like this……

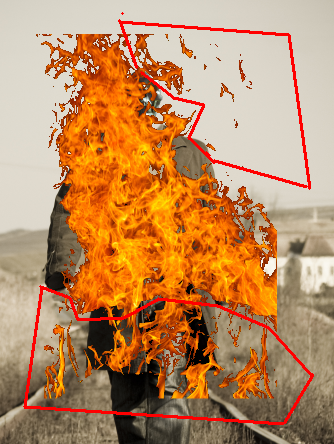
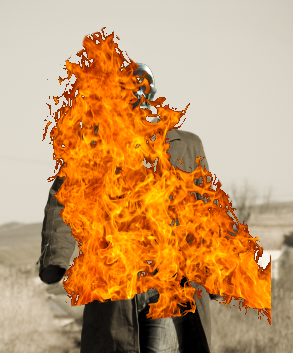
Step-10
Resize the fire and place it behind the skull like this….

Step-11
Erase the skull with minimum opacity to blend it into the fire.

Adding fire reflection over shoulders:
Step-12
Select brush with orange color (#FFB801)
Brush(opacity 10%) the shourlders in new layer with “Pin Light” blending mode.

Step-13
Similarly add fire and reflection to the hands.

Adding chain:
Step-14
For chain lets take the following image.
Extract the chain from the image using “Polygonal lasso tool (L)”
Duplicate it and stitch it to increase its length.
Add it to the man in the following way.

Duplicate the chain and liquify(filter>>liquify) it in the following way.

Step-15
Add drop shadow to the chains with following properties

Step-16
Liquify the dress of the man to give the effect of chains weight over the dress.


Step-17
Finally, create a new layer(top most layer) and fill it with blue color (#205D90), set blending mode to “Soft Light” to get result like this….
I hope, you find this tutorial useful.
Enjoy!!