Final Image:

Define Brush:
Step-1
Before we start off, lets define a brush which we are going to use in coming steps.
Create a new document with white background.
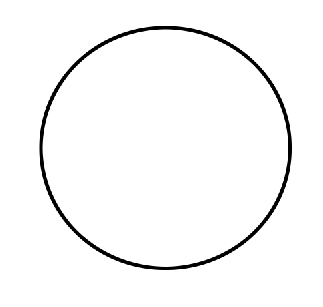
Draw circle using Elliptical Marquee Tool(M).

Step-2
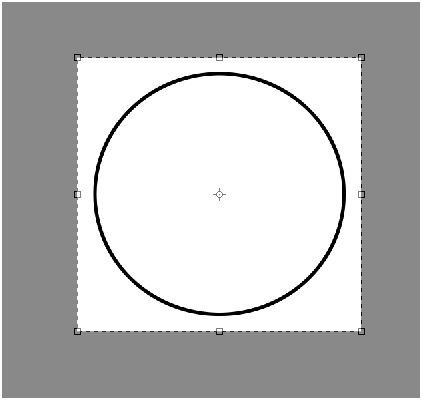
Go to Edit>>Stroke and set stroke to 10px with black color.

Step-3
Lets crop the document to the circle size.
Select Crop Tool (C), crop the circle.
And press enter to crop.
Step-4
Now, go to Edit>>Define brush, give name “circle”.
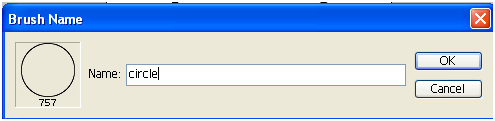
This is how brush is defined.
Working the text:
Step-5
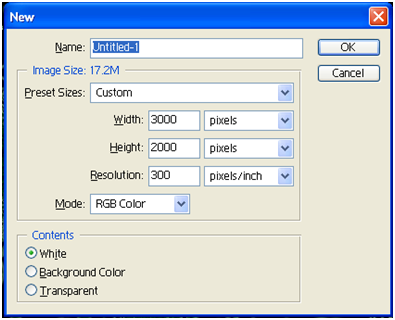
Create a new document .
Step-6
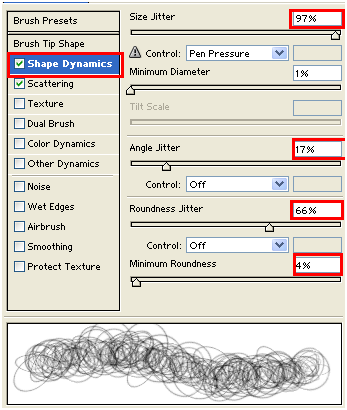
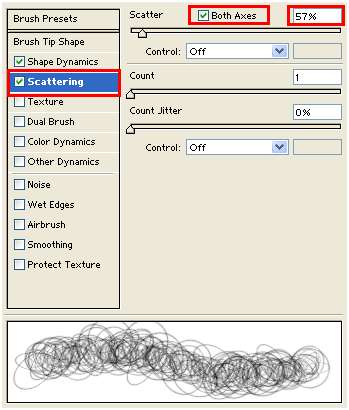
Select brush with following properties.
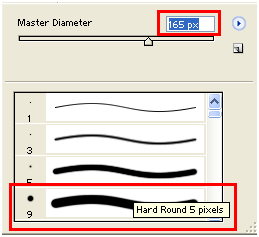
To set random circle size.
To set random scattering.
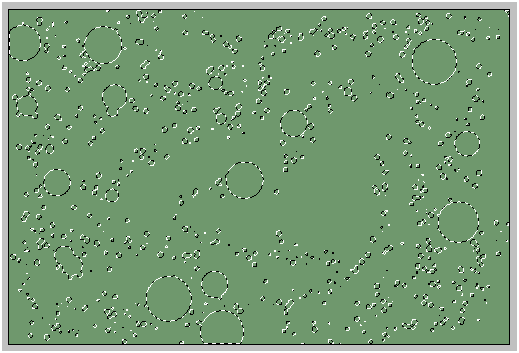
In new layer, draw random circles in the following way.

Step-7
Set Foreground and Background colors.
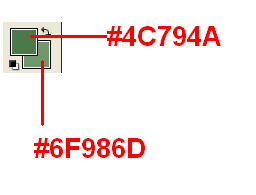
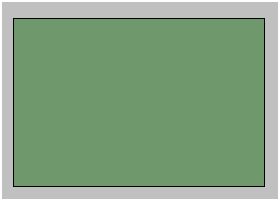
Step-8
Select new layer, fill it with light green color (#6F986D)
Step-9
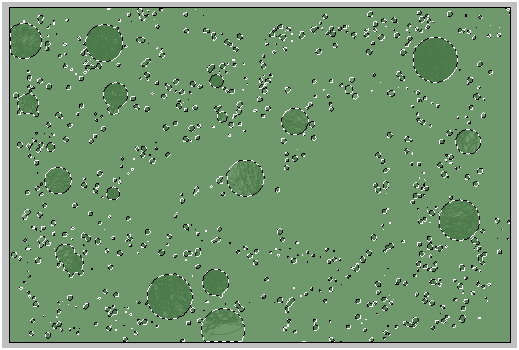
Now, press “Ctrl” and click on the random circles layer to make selection.
Step-10
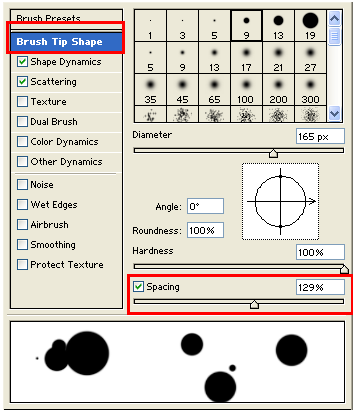
Select brush tool with “circle” type(which we defined earlier) and set the following settings.
To set spacing.
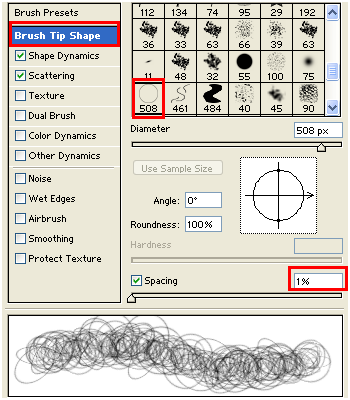
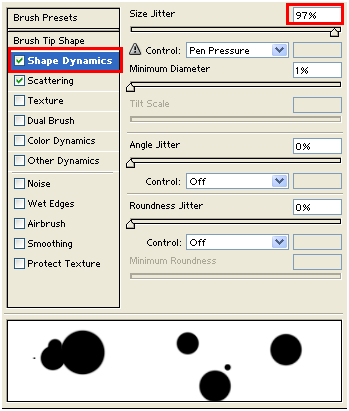
To set random angles, roundness and size.
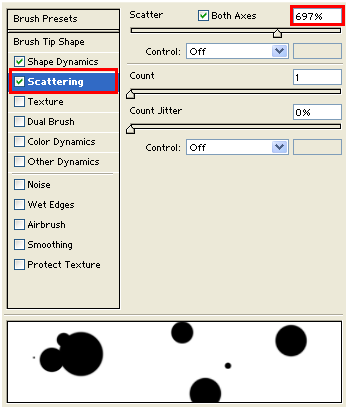
To set random scattering.
Step-11
Draw circles in the selection with dark green color (#4C794A) in the same layer in which we filled with light green color earlier.
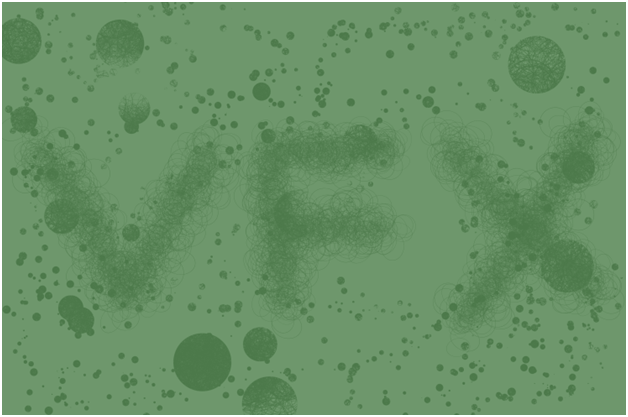
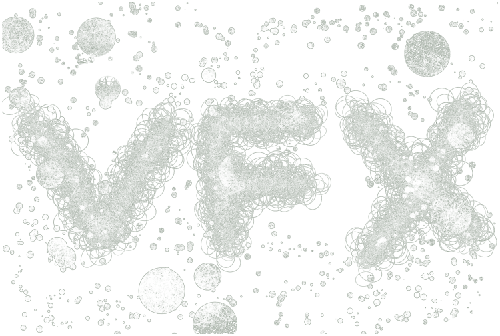
Step-12
In the same layer, draw any text with same circles.
Step-13
Duplicate the layer.
Select original layer

Step-14
Go to Filter >> Stylize >> Find edges.
Step-15
Go to Filter >> Stylize >> Glowing Edges
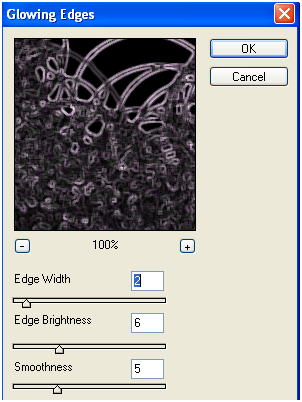
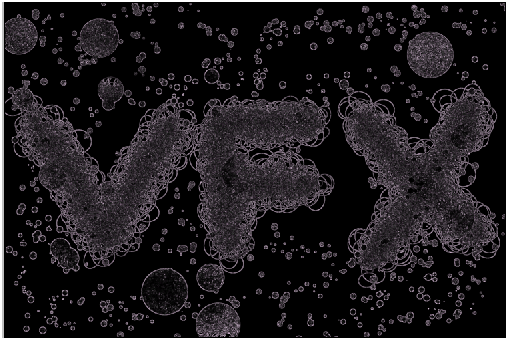
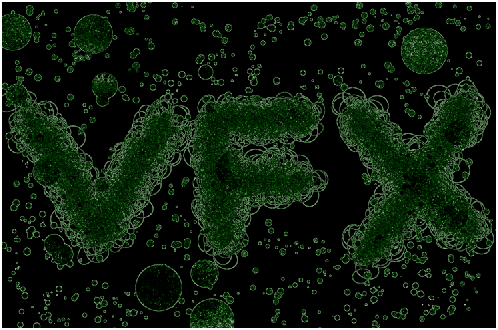
Step-16
Now, unhide the duplicated layer and set blending mode to “Vivid Light” to get result like this…
Create Lens Effect:
Step-17
Select lasso tool (L), set feather to 50px and make selection of text and few parts of the bacteria.
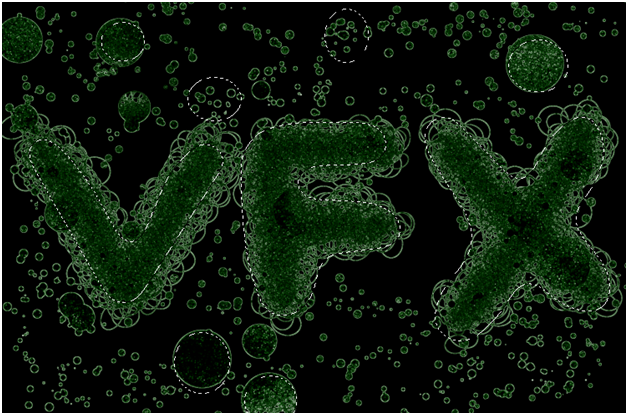
Step-18
Inverse the selection (Ctrl + Shift + I)
Go to Filter >> Blur >>Gaussian Blur.
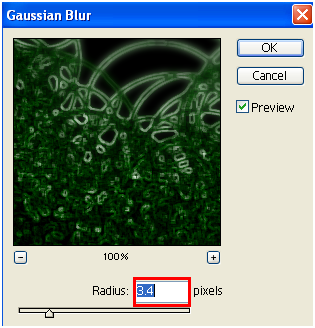
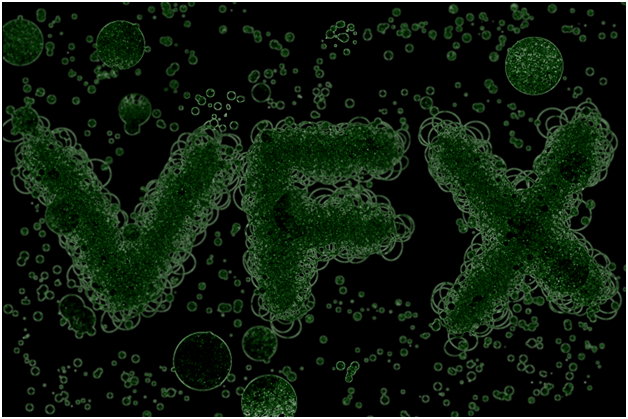
Step-19
To increase the depth, lets select few parts of the bacteria and blur it little more.

Step-20
Go to Filter >> Blur >>Gaussian Blur.
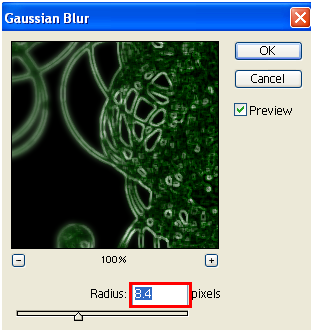
Finally you result like this…

I hope you find this tutorial useful.
Enjoy!!